
How to Make Laminated Dough
Laminated dough might seem intimidating, but it’s a game-changer once you get the hang of it. Those buttery, flaky layers don’t happen by accident—it’s all about technique, temperature, and patience. Whether you’re making croissants, puff pastry, or Danish dough, the key is keeping the butter cold and the layers intact. Stick with us, and we’ll walk you through the process below. We’ll also give some laminated dough examples.
What Is Laminated Dough?
Laminated dough gets its name from how it’s made—by folding butter into dough over and over to create thin, alternating layers. This technique gives pastry shop products like croissants, puff pastry, and danishes their signature flaky, airy texture.
Unlike standard dough (where butter is mixed in), laminated dough requires rolling, folding, and chilling repeatedly. The chilling steps are crucial because they keep the butter firm so it doesn’t blend into the dough. Doing this helps maintain distinct layers, which is key to getting that crispy, flaky result when baked.
The process starts with rolling out the dough and placing a thin sheet of butter on top. The dough is then folded over the butter, rolled out again, and folded multiple times to build layers. This can take hours, sometimes even days, depending on the recipe. It’s all about patience and precision.
Why go through all this effort? When laminated dough bakes, the water in the butter turns to steam, pushing the layers apart. Meanwhile, the fat in the butter crisps up the dough, creating a light, golden, flaky texture. That’s why biting into a fresh croissant or a perfectly made puff pastry feels so satisfying.
Laminated dough isn’t the quickest or easiest to make, but the results speak for themselves. Whether in a buttery pain au chocolat or a delicate mille-feuille, those thin, crispy layers make it worth the time and effort.
10 Laminated Dough Examples
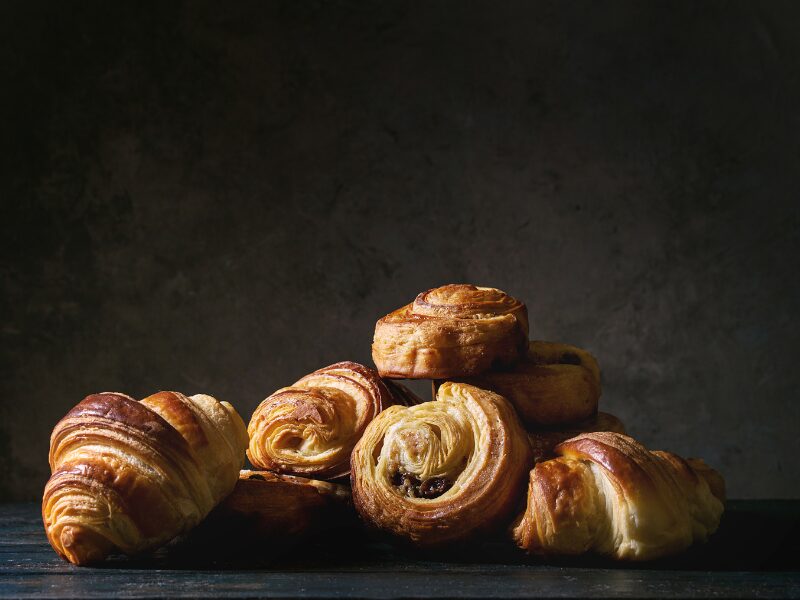
Laminated dough makes all these pastries crispy, flaky, and delicious. Whether sweet or savory, each one is a testament to the magic of layering butter into dough.
1. Croissants
Croissants are the most famous laminated pastry. These crescent-shaped, buttery rolls originated in France but were inspired by Austrian baking. The dough is layered with butter, rolled, and folded multiple times to create a light, flaky texture. You can also find filled versions, like pain au chocolat (chocolate-filled) and almond croissants. Savory options include cheese, ham, or spinach-filled croissants.
2. Danish Pastries
Danish pastries are a sweeter, richer variation of laminated dough. They’re originally from Austria but perfected in Denmark. The dough includes eggs and more butter, making it slightly softer than croissant dough. They are often topped with fruit, nuts, or custard and sometimes drizzled with icing or frosting.
3. Puff Pastry
Another laminated dough example is puff pastry or pâte feuilletée. It’s made with just flour, water, salt, and butter—no yeast. It puffs up dramatically in the oven because the layers of butter create steam, which separates the dough into crisp, flaky sheets. Puff pastry is used in sweet and savory dishes, like mille-feuille (Napoleon pastry), turnovers, and cheese straws.
4. Kouign-Amann
This pastry from Brittany, France, is like a caramelized croissant. The dough is laminated with sugar and butter. This creates a crispy, caramel-coated crust with a soft, flaky interior. It’s sweet, rich, and slightly chewy.
5. Flaky Pastry
Next on our laminated dough examples list is flaky pastry. It’s similar to puff pastry but has fewer folds, making it a little denser. It’s used for dishes like sausage rolls, turnovers, and some types of pies. It still has layers but isn’t as puffy as traditional puff pastry.
6. Jachnun
Jachnun is a slow-cooked, laminated dough roll. It’s a Yemenite Jewish pastry baked overnight at a low temperature. This process results in a soft, slightly sweet roll with a golden-brown crust. It’s usually eaten with hard-boiled eggs and tomato sauce.
7. Kubaneh
Kubaneh is another laminated dough example of Yemenite Jewish origin. It’s a pull-apart bread made from laminated dough. It has a soft, buttery texture and is traditionally baked overnight and often served for Sabbath breakfast.
8. Malawach
Malawach is a Yemenite Jewish flatbread made with laminated dough. It’s pan-fried rather than baked. The process gives it a crispy, layered texture. It’s usually served with honey or a tomato-based sauce.
9. Paratha
A South Asian flatbread, paratha is made by layering and rolling dough with ghee or butter. It’s then pan-fried until golden and flaky. It can be eaten plain, stuffed with ingredients like potatoes or paneer, or served with curries.
10. M’semen
M’semen is a traditional North African flatbread made by folding and rolling dough with butter or oil before being pan-fried. It’s soft and slightly chewy and often served with honey or savory fillings.
How to Make Laminated Dough
Making laminated dough might sound fancy, but it’s really just a cycle of rolling, folding, and chilling to trap butter between layers of dough. The result? Flaky, buttery perfection. Let’s break it down step by step below:
1. Make the Dough
Start by mixing your dough. This is a simple yeasted dough that doesn’t need too much kneading. Overworking it will make it tough, and you want it to stay soft so it can stretch around the butter later. Once mixed, shape it into a flat rectangle, wrap it in plastic, and let it chill in the fridge for at least two hours or overnight if you have time.
2. Prep Your Butter
Cold butter is key, but it needs to be pliable. Place your butter between two sheets of parchment paper and smack it with a rolling pin until it’s about ½ inch thick and forms a square. Use a bench scraper to tidy up the edges. If it gets too soft, pop it back in the fridge for 15 to 30 minutes. You want it cold but flexible, not rock hard.
3. Roll Out the Dough
Lightly flour your surface and roll your chilled dough into a rectangle that’s about twice the size of your butter block. Place the butter in the center, turn it 45 degrees like a diamond, and leave the corners of the dough exposed.
4. Enclose the Butter
Next, fold the exposed corners of the dough over the butter. Stretch it slightly to cover it completely. Then, press down the seams with your rolling pin to seal the butter inside. Now, you have a dough package with butter locked inside.
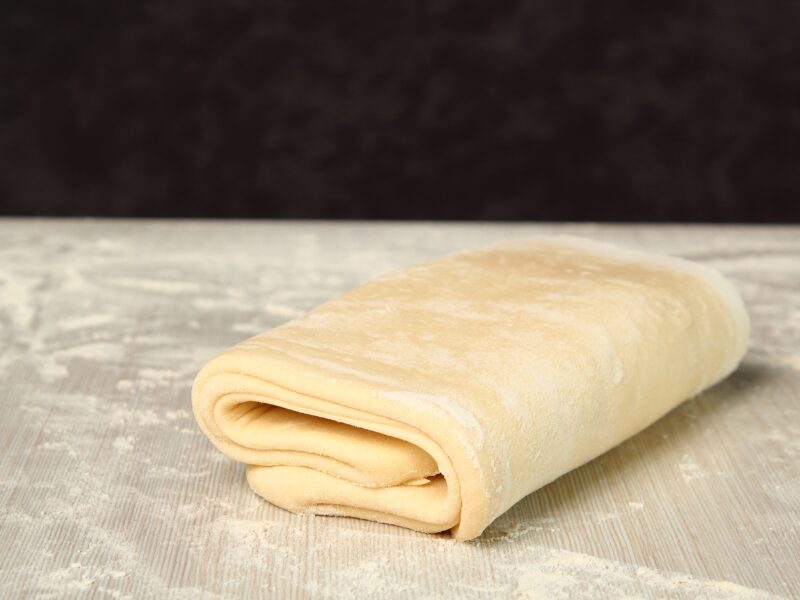
5. Roll and Fold
Roll the dough into a long rectangle, about three times as long as it is wide. Be gentle so you don’t push the butter out. Then, fold the dough into thirds, like folding a letter. That’s your first turn. Wrap it up and chill for at least 30 minutes to relax the gluten.
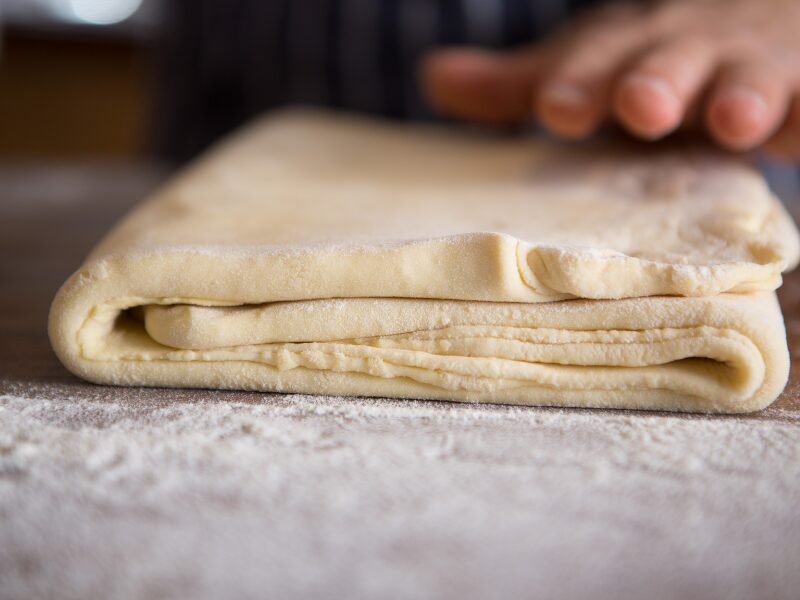
6. Repeat the Folds
Take the dough out, roll it back into a long rectangle, and fold it into thirds again. That’s your second turn. Repeat this process for a total of three turns. Always chill the dough for 30 minutes to an hour between turns to keep the butter from melting.
7. Rest and Shape
Your laminated dough is ready to be rolled out and shaped after the last chill. At this point, you can use it for croissants, Danish pastries, or any recipe that calls for flaky layers. Just roll, cut, shape, and let it proof before baking.
Laminated Dough Tips
Laminated dough requires patience and precision, but the payoff is worth it. Keep your butter cold, roll evenly, rest between folds, and bake at the right temperature. Follow the tips below to get amazing laminated dough:
1. Choose the Right Butter
Not all butter is the same. Use high-fat European-style butter (82% fat or more). It has less water and more fat, making it pliable and perfect for lamination. Regular butter has too much water, which can make the layers less distinct and lead to more shrinkage during baking.
2. Keep Your Butter Cold
Butter is the star of laminated dough, and it has one job—creating those flaky layers. If your butter gets too warm, it will seep into the dough instead of staying in distinct layers. That means no flakiness but a dense, bready texture. Keep your butter cold at all times. If it starts softening, pop everything in the fridge for 15 to 20 minutes before continuing.
3. Roll Evenly and Gently
Apply even pressure when rolling out your dough. Uneven rolling can cause the butter to pool in some areas and disappear in others. Use a light touch—don’t press too hard, or you’ll force the butter into the dough instead of keeping it in layers.
4. Keep Your Work Surface Cool
A warm countertop can make the butter melt, making lamination difficult. If your kitchen runs warm, chill your rolling pin and work surface. A marble slab is great for this since it stays naturally cool.
5. Rest Between Folds
Don’t rush the folding process. Let it rest in the fridge for at least 30 minutes after each turn (folding the dough over itself). Doing this allows the gluten to relax and the butter to firm back up. If you skip resting, your dough will resist rolling and possibly tear.
6. Use Light Flour Dusting
Too much flour while rolling can mess with the dough’s hydration, making it dry and tough. Use just enough to keep it from sticking but not so much that it alters the texture.
7. Cut with Sharp Edges
Use a sharp knife or pastry cutter when shaping croissants or pastries. Doing so prevents the layers from compressing. Dull edges press the layers together, which can ruin the structure and keep them from rising properly in the oven.
8. Proof in a Cool Spot
Proofing laminated dough is tricky because you need warmth for yeast to work. However, too much heat can melt the butter. Aim for a room temperature of 75°F (24°C). If your kitchen is too warm, proof it in a cooler spot or even in the fridge for a longer time.
9. Bake at the Right Temperature
Croissants need high heat to puff up properly. Bake at 375 to 400°F (190 to 200°C). If the oven is too cool, the butter will leak out instead of creating steam. If it’s too hot, the outside will brown too fast before the inside is fully baked.
10. Check for Proper Bake
A well-baked croissant should have a deep golden-brown crust. If it’s pale, it’s likely underbaked and might be doughy inside. Give it a few more minutes until it develops that signature crisp, flaky texture.
Frequently Asked Questions
Here are four examples of laminated dough: croissants, puff pastry, Danish pastry, and kouign-amann. Each one has distinct textures and flavors, but they all rely on laminated dough.
Puff pastry is a type of laminated dough, but it doesn’t contain yeast, so it relies entirely on steam for lift. Other laminated doughs, like croissants and Danish pastry, contain yeast, which gives them a softer, more structured texture.
Letting the butter get too warm can ruin your laminated dough. It will cause it to blend into the dough, ruin the layers, and make the final product dense. Too much flour while rolling can also dry out the dough, cause cracks, and leak butter.
Bread flour is best for laminated doughs like croissants because its high protein content provides structure and height. A mix of all-purpose and cake flour works well for puff pastry.
Conclusion
Laminating dough creates those beautiful, flaky layers by trapping butter between thin sheets of dough. When the pastry bakes, the butter melts and releases steam, which puffs up the layers. The key to success? Keep everything cold, work quickly, and don’t rush the chilling steps. Now, you’re ready to make high-quality pastries at home. Happy baking!
About HICAPS
Over the years, HICAPS has helped bakers and businesses make delicious products by offering ingredients like ChiffonAide Cake Oil, Magic Whizk Whipping Cream, Red Velvet Flavor Emulco, and Instabake Brownie Mix.
HICAPS also provides tools and resources to valued partners, such as the free “How to Increase Your Sales Amidst the Pandemic” E-book and free dealer locator that helps look for baking ingredients near me.
Want more free tips and tutorials? Follow us on Facebook at Hicaps Mktg. Corp. and on YouTube at HicapsTV. Want to be one of our valued partners? Fill out this form. Looking forward to talking to you soon!


