How to Frost a Cake: Beginner’s Easy Guide
Beautifully iced layer cakes are gorgeous and are a treat to the eyes and taste buds! However, icing a layer cake with a near-professional result takes hours and hours of practice. Not to forget, it is also a detailed art that will draw out your most patient self. This article will guide you on how to frost a cake, perfect for beginners.
So, with this in mind, don’t let disappointment dampen your spirits if your first iced cake does not look what you imagined it. You will undoubtedly refine your skills and improve with every layer of cake that you ice! And remember, practice makes perfect.
Cake Decorating Tools Needed on How to Frost a Cake for Beginners
The first step towards icing a layer of cake is to ensure you’ve got all the right equipment. Cake decoration is an art and a skill. Your icing attempts will fare depending on the tools you use because you’re only as good as your tools!
Below is a glance at some convenient and practical cake decorating tools for icing a cake layer.

Revolving Cake Stand
A revolving cake stand will probably not be a priority for most beginner cake decorators. You should be able to ice your layer cake quite well, even without a revolving cake stand.
Revolving stands lean towards the more expensive side, but they last longer. However, it will make your job far easier and quicker.
It is also likely to be a valuable and worthwhile investment if you are thinking of delving deep into cake decoration as a skill.
Serrated Knife
A serrated knife is crucial for leveling the layer cake (if necessary). You can also use cake strips to wrap around your cake pans so that your cake layers are primarily flat.
Large Angled Spatula
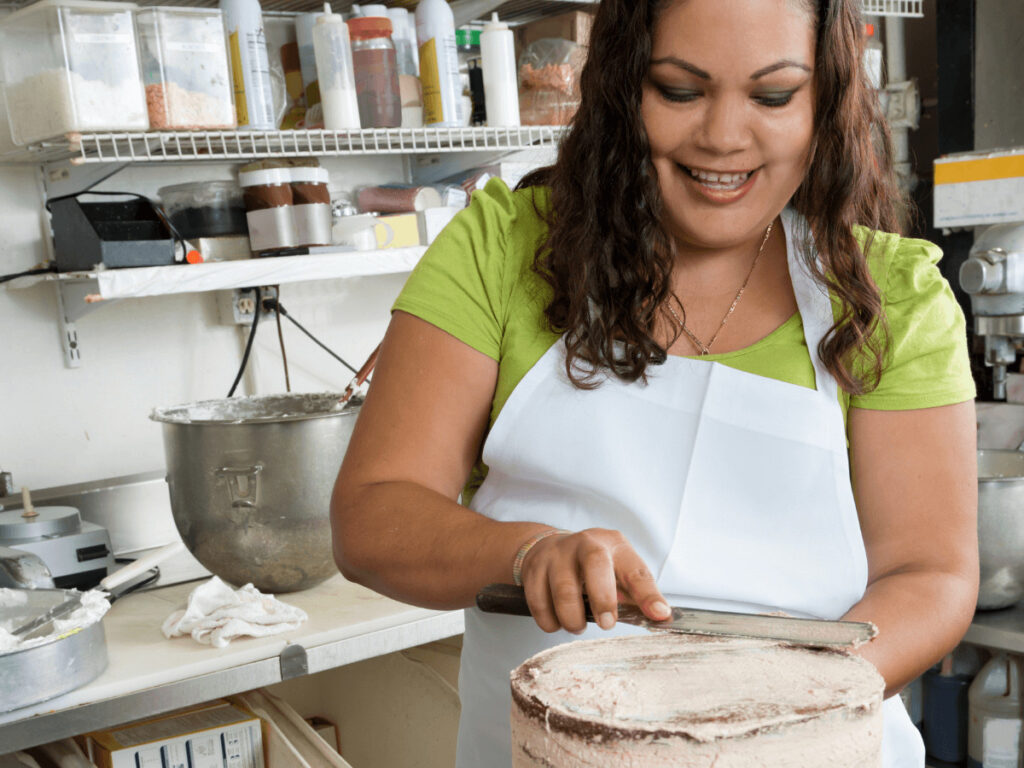
The final layer of frosting turns out best if you use a large angled spatula for it. The large size covers more surface area for efficient icing. You can also turn it sideways and conveniently apply the icing to the sides of your layer cake.
Small Spatula
While a large angled spatula can get most of the job done, a small spatula is necessary for final touches. A small spatula is helpful when you need to cover gaps or holes in your icing after you’ve applied your final layer of buttercream.
Pastry Scrapers
Pastry scrapers help smooth out frosting edges and scrape off extra buttercream.
Piping Bags
There are different types of piping bags available, including disposable and reusable bags. Large, disposable piping bags are often highly convenient since they don’t need frequent refilling.
Additionally, reusable piping bags are challenging to clean once used. If you do not keep them fully clean after every use, they can pose health and hygiene risks and affect your icing.
Round Icing Tip
Round piping tips are helpful when it comes to getting a uniform layer of icing on your cake. If you slather estimated amounts of frosting on your cakes, your icing may lack evenness.
Cake Icing Tip
Cake icing tips come in all shapes and sizes. You can find disposable piping bags to fit the tips conveniently.
Cake Boards
Using cake boards isn’t always necessary. Suppose you’re relocating the cake or presenting it to someone, though. In that case, you’ll need cake cardboard that fits your cake underneath your initial layer.
Make Sure Your Frosting Is Good
For icing a layer cake, a nice whisked, thick buttercream frosting is usually a good start. Refrigerate it for a few minutes if the frosting is too runny for the cake.
You don’t want it to be too chilly, either, because it has to be able to spread quickly. It’ll rip your cake apart and leave you with a crumbly mess if it’s too cold!
For beginners, the amount of frosting you will need to cover your entire cake layer is also something you must keep in mind.
You’ll need enough to fill the gaps between the cake’s layers, frost the finishing coat, and pipe on a lovely border. You may refrigerate and save any leftover buttercream if you don’t use it completely.
Does your buttercream have far too many air bubbles when you apply it? If yes, return it to the bowl and whisk it around to remove some excessive bubbles.
Getting Started With Frosting: Flat Cake Layers

- For beginners, before you dive into frosting your cake, begin with flat cake layers. Cake layers in the shape of domes may not appear as professional as you may expect. Moreover, they are harder to perfect as well.
- Suppose your cakes cave while baking; you can fill the cavity with frosting. As such, you don’t need to level the cake.
- Furthermore, you can use cake strips to get a flat, uniform cake surface.
- Additionally, a serrated knife can be pretty handy to slice away at any minor inconsistencies.
- Begin by cutting, as deep as it is suitable, into the cake with a sawing motion with the knife, rotating the cake as you go. Continue to move the blade inwards a little. If you’re torturing the layers of your cake, that is, cutting them in half, do that now before starting to frost them. A cake slicer is another valuable tool for carrying out this task.
- Once you are ready with a flat cake layer, you can place the cake on a cake board. Alternatively, you can put it on a cake plate with the help of a cake lifter as well. You can use a dollop of frosting as a type of “glue” on the cake board to hold the cake in place.
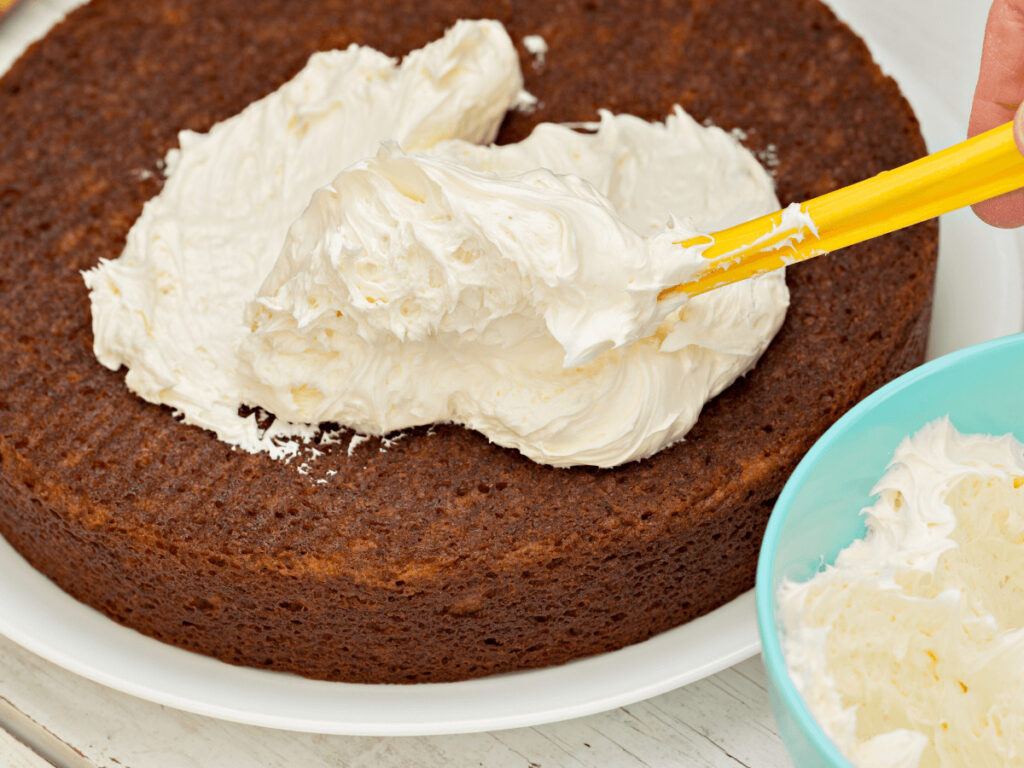
- It will prevent your layer cake from slipping and sliding when you are icing it. Then, with the help of an angled spatula, top the layer with around half a cup of frosting.
Measuring Out The Frosting For Uniformity

- With your angled spatula, gently spread the frosting over the cake layer in a consistent manner. It would be ideal for pushing any excess frosting towards the edges of the cake.
- After this, carefully place the second layer of the cake atop the bottom layer. Follow the same process you adopted for the icing of the first layer. Keep repeating this for all your layers while making sure that you use equal amounts of frosting for every layer.
- When you reach the last layer, place it on the frosted layers with its flat bottom facing the top. Then, ice the topmost layer with half a cup of frosting and spread it evenly and cleanly.
- Now, it is time to rope in the angled spatula once again. Apply a thin layer of icing on the sides of the cake and cover it entirely. Make sure you patiently smoothen the top and the sides of the cake as neatly and uniformly as possible.
- This coat of icing on your layer cake is called the crumb coat. Its purpose is to hold together any loose crumbs that may line the soft cake underneath. Once you have applied this layer of frosting, put the cake in the refrigerator for a minimum of thirty minutes. It will help the crumb coat set.
Final steps on frosting your cake for beginners.
- You will find yourself repeating some former steps once more at this stage. When you have your cake out of the refrigerator after sufficient chilling, spread half a cup of frosting on the top of your layer cake. Follow the same process of uniformly applying the frosting over the upper side of the cake.
- Next, ice the sides of the cake similarly to the crumb coat. However, the difference this time will be that you will need to use generous amounts of frosting. Use as much as you need to perfectly cover up your entire cake, leaving no gaps or cracks. Slowly and calmly, spread the icing all over the cake until optimum smoothness.
- If you own a revolving cake stand, use a cake knife to smoothen the sides of your baked and iced treat. Rotate the cake slowly while holding a small spatula or icing knife straight up against the sides of your cake.
- Use the same procedure to smooth the top of your cake after smoothing the sides. This process will demand a handful of practice sessions before achieving completely smooth edges.

Frequently Asked Questions
Here are some common questions about frosting a layer of cake for beginners.
Is it possible to add a soft filling to the icing?
Yes, it is possible to line the layers of your cake with a different filling other than standard frosting. Lemon curd is one such example. If you are using a soft filling, the ‘dam’ icing technique may come in handy! You can make a ‘dam’ along the edge of the cake layer to keep the filling in and prevent it from seeping out through the sides.
What happens if you use little frosting while icing your cake?
If you use a less than generous amount of frosting when you are icing your cake, the frosting and your actions of applying it may tear up the soft cake underneath.
So, make sure you always use a sufficient quantity of frosting.
You can aim for frosting or filling that is almost half the thickness of the layers of your cake.
How to properly smooth the top of the final layer of icing?
Smoothing the final layer with a big angled spatula is ideal. As you run it over the top, it blankets the cake in motion. As you do this, it’s a good idea to get up close, down to the eye level.
Starting at the edge, slide the spatula over the top and towards the middle, then repeat in a circle. Then, using the spatula, move across the top to remove any accumulated icing.
What can you do to make your cake smoother?
Suppose you have applied the crumb coat, used the correct tools, taken extra care while filling in gaps in the icing, and used good-quality frosting. In that case, you should have a decently smooth icing.
However, if your cake still is not as smooth as you would like, don’t worry! You can use a glass of hot or warm water. Dip your spatula inside it, wiping it with a paper towel.
Then, use the spatula’s hot surface to smoothen the cake’s frosting lightly. It is ideal for holding the spatula at an angle of 45-degrees while gliding it over the cake.
Endnotes
For beginners, icing a layer cake can test your patience and persistence! However, if you keep at it, you will soon emerge with improved skills.
Once you have iced your layer cake, you will have a fresh cake canvas ready for cake decoration. You can add sprinkles or a creative or colorful buttercream border along the edges of the cake.
You can use different piping bag tips to obtain the results you seek. If you feel that your cake icing is not perfect, you can always use cake decorations to compensate for it!

About HICAPS
Hicaps Mktg. Corp is committed to helping bakers and businesses everywhere make delicious products by offering ChiffonAide Cake Oil, Magic Whizk Whipping Cream and Emulco Flavors!
Follow us on Facebook or YouTube for more free tips & tricks that will transform your baking experience.


